Saturday, January 4, 2014

A Newfound Appreciation: A Toilet and Shower

When we moved in, the toilet and shower had not yet been installed. Rob had managed to install the tiles - they are tiles that look like wood - in the toilet room prior to the Thanksgiving craziness, and he installed the toilet a few days after we moved in.

I was pretty excited to finally have a toilet! Doesn't it look like a throne?
Here's the room with the sink installed

We had our first snow of the season....


A Deer on our Driveway

And decided to start wearing our Klompen

Rob then began work on the shower...

Rob is applying Thinset to the walls which is an adhesive-based cement that holds the tiles in place

The green spacers keep the tiles evenly spaced


Here Rob is installing the floor heater before he put in the floor tiles

Installing the shower

I had my first shower on Christmas Eve!

Rob worked until midnight the night before he left for Holland to get the sink installed.


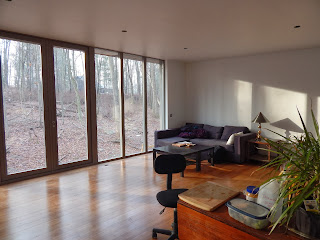
Here's what the house looks like right now....


And finally some awesome deer pics in the snow....


A two-point buck that shares the land with us


Happy New Year!

A Thanksgiving filled with...Bamboo Flooring?

After the plasterwork, Rob amazingly painted the whole upstairs with a primer coat and a coat of paint in less than three days. We were in a hurry to get the upstairs painted because we wanted to install the floor before we were moving in on Nov. 29 - and we had help that week from Lance and Judy who came to spend Thanksgiving break helping us! We ordered carbonized bamboo flooring the week before, and it got to us just in time for installing it Thanksgiving week. Bamboo flooring is said to be more "green" than hardwood floors because bamboo grows much more quickly than hardwood trees (oak, maple, etc). Unfortunately, we were sent three different shades of the bamboo flooring, and had to send back a third of the boxes that were too light. We did get most of the floor installed, however, before we moved in.

That's not how it's supposed to look, is it? 
Lance used the crowbar to take up the panels with the three shades

After the oddly-shaded panels were torn up, we changed direction and started over in the east-west direction. We all took up our posts....
 
My job was to glue the grooves on the tongue-in-groove panels 

Lance hammered the panels into place
Rob secured the panels with the nail gun
Judy was the facilitator passing the panels between me and Lance to speed up the process

We had some long days, including....

Yoga!
Naps!
Love!
Dancing!

And Celebrating! Yes, we have a floor!


Sheetrocking the Ceiling and Plasterwork

One of the difficulties with cellulose insulation is that no matter how tight you staple the Insulweb on the ceiling rafters, the Insulweb will still sag due to the weight of the cellulose. It therefore has to be pushed up with rollers so that the sheetrock can be put on. This rolling is very difficult work - overhead and time consuming - more frustration with the cellulose installation process.


We rented a sheetrock lift to assist with lifting the 4x8 boards up to the ceiling


Rob had to cut out holes in the sheetrock for each of the recessed lighting fixtures

Hans was such an amazing help - we love you, Hans!


After the sheetrock was up, the next step was the plasterwork, which meant sealing all the seams in the sheetrock with tape and covering the seams and all the screws with "compound." Cousins Lance and Judy came to help again - incredible! It took us a full weekend to put on the first coat with Lance and Judy, and then Rob spent several more days adding two more coats with water to even out the compound.


House with chicken pox or indoor snow storm?


Friday, January 3, 2014

The Blower Door Test

Once the cellulose was blown in, Jim Millhouse from National Fiber came over to do a blower door test. This is a test to see how airtight the house is. He also brought over his infrared "thermal" camera so that he could see any areas we may have missed while blowing in the cellulose.

This set of pictures shows Jim setting up for the blower door test.


What is a blower door test?
A powerful fan is mounted into the frame of an exterior door, and the fan pulls air out of the house, lowering the air pressure inside. The pressure on the gauge is set to -50 Pascals (Pa) and the CFM (cubic-feet-per-minute airflow) can be read on the other side of the gauge. According to an energy conservatory article by David Keefe, "Tight houses tend to measure less than 1,200 cfm50, and moderately leaky homes measure between 1,500 and 2,500 cfm50. Homes that measure over 3,000 cfm50 are considered leaky" (p. 4, http://www.energyconservatory.com/sites/default/files/documents/blowerdoortestingjlc.pdf).

We waited with anticipation to see how tight our upstairs floor was....

Rob wasn't satisfied with our rating of 189 CFM (already extremely airtight), and vowed to get the measurement down to 100 CFM through filling in gaps, caulking, etc. 


Jim used the infrared camera to find a few areas where the cellulose needed to be filled in, mostly in the corners, which is typical for cellulose insulation. 


The dark spots in the camera show areas that are cooler, i.e. where air is leaking in

Rob and Jim brainstormed ideas for getting the house even more airtight

Jim then set up the blower door test downstairs, and while it wasn't quite as airtight as the upstairs, it was still much more airtight than an average house. Jim found a few places that were "leaking" air, especially one of the windows, which hadn't yet been sealed. 


Overall, Jim was very impressed with our work, and the national technical director for National Fiber wants to come take measurements on the house once the caulking is complete.